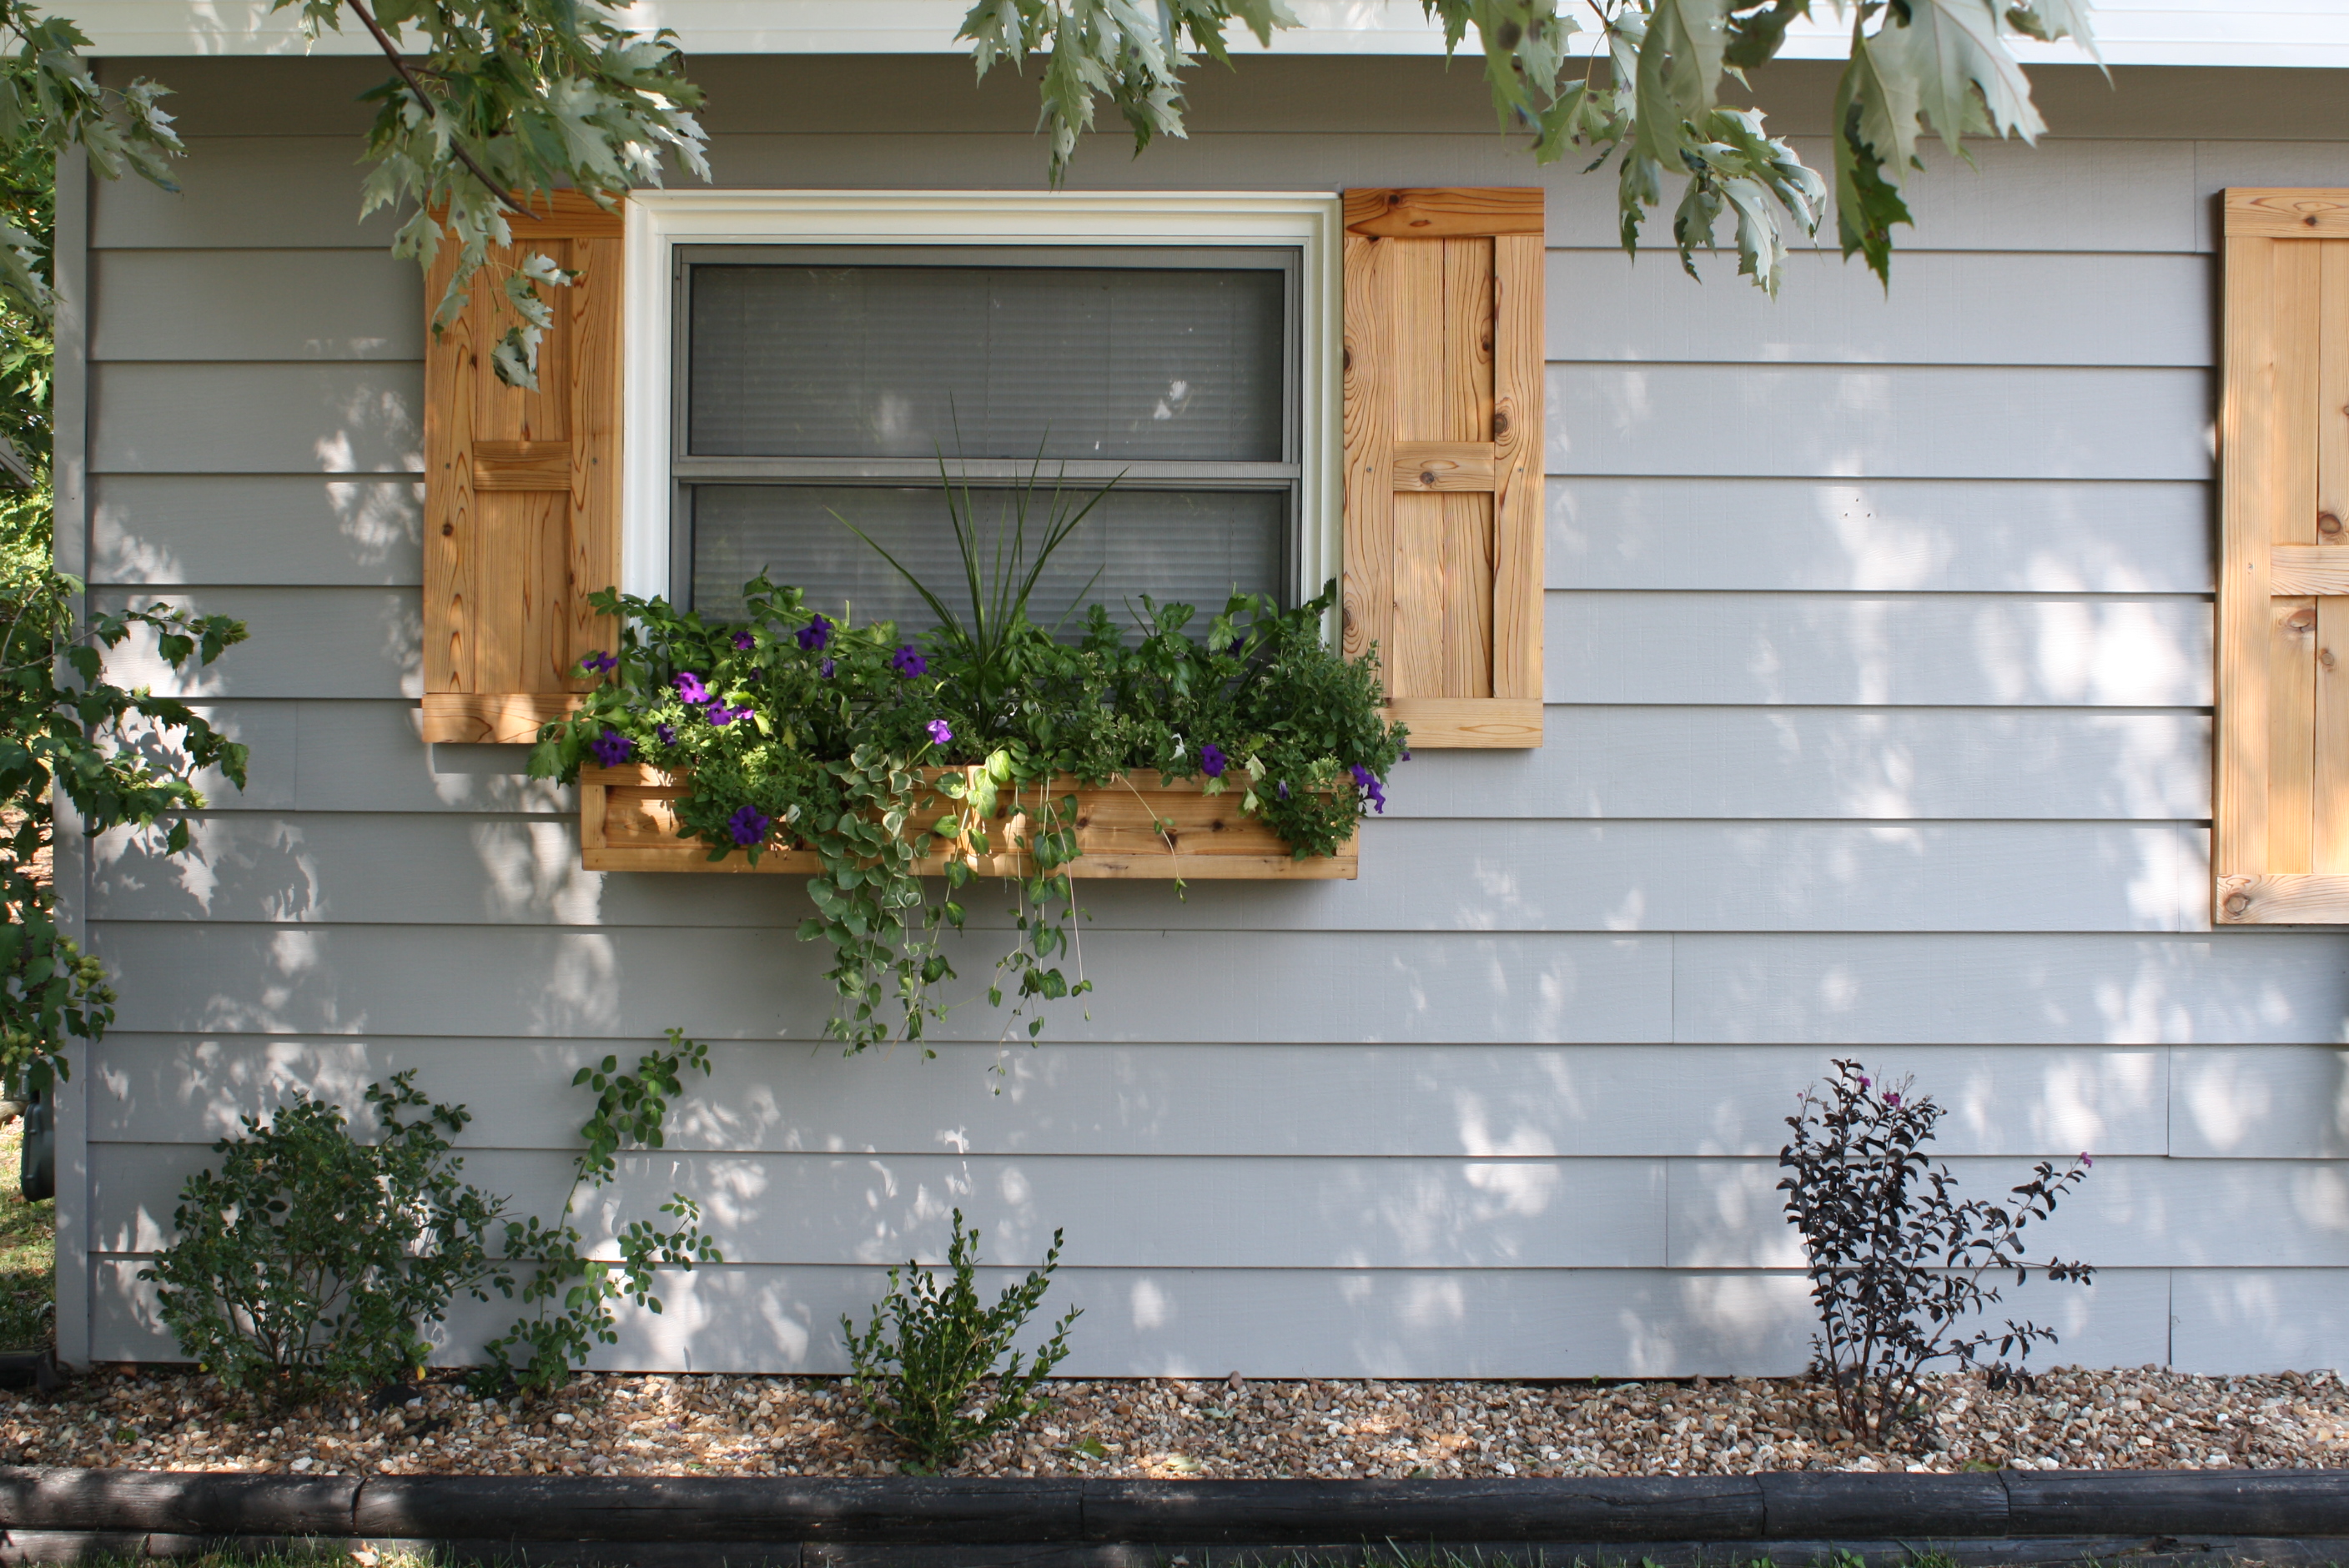
Cedar shutters and window boxes are one of the quickest ways to add charm to a house. At a recent renovation, this house was in dire need of charm and I opted to use cedar for the contrast it provided with the grey exterior color.
Word to the wise-if you are going to the trouble of crafting these by hand out of cedar, then make sure to seal them properly to make sure the color stays and they never rot! Otherwise they will turn silver-grey over time, which looks great, but not if you meant them to stay cedar toned. Cedar is naturally weather resistant, so you don’t have to protect it, but doing so ensures a much longer life. I used Thompsons waterseal in transparent because I didn’t want the color any darker. You can pick it up at any big box store or here on Amazon.
I looked up several ideas before I decided on the design I wanted, made the measurements and put them together. I’m terrible at taking pictures as I go, which is one of my New Year’s Resolutions-to actually be able to help someone else not make the same mistakes I make, by showing you all how I did it wrong before I got it mostly right!

I started with just the shutters and I thought they were pretty cute, but it just didn’t quite cut it, so I decided to add some window boxes.

I loved the charm the DIY cedar shutters and windowboxes added. Now the house seems inviting and warm.

The shutters took me a day from getting the wood, cutting it down to size, putting the shutters together, and finally attaching them to the house. The window boxes took about the same amount of time, but I did have to have my cute hubby help me install them because we had to secure the planters into the studs of the house to ensure they never came plummeting off the front of the house into the shrubbery!
Every flower in these window boxes was at least 75% off, if not free! I scoured a local greenhouse and made off with their most pitiful plants. They couldn’t believe I wanted them…my electrician(who was also a gardener) thought I lost my mind…even my mother who can grow anything was skeptical!! I had almost nothing to lose, so I consistently watered them almost everyday and they all got ” target=”_blank”>Miracle-Gro every Sunday and no one could believe that I hadn’t switched out the plants!!! I put the before below:

TIP: I am leery of too much weight in flower boxes but I like the visual impact of how deep they are, so I use whatever non biodegradable filler I have around in the bottom of the boxes to raise the plants up without filling it completely full of dirt. In these particular ones, I had enough plant pots from the nursery that I could turn them upside down and then fill in the dirt on top to work perfectly. You could use soda pop cans or plastic bottles cut in half, whatever will hold its shape and not break down over time.

I hope this gives you inspiration to tackle a cute upgrade on your own or at least gives you some hope of Spring!
Em 🙂
*This post may contain affiliate links which provide a small commission to me at no additional cost to you.