Follow this mobile home makeover on a budget! We purchased a mobile home to renovate as a rental property…or I should say my husband bought it and I didn’t say no! I wasn’t so sure about this whole thing, because the budget was EXTREMELY tight, around $1000.
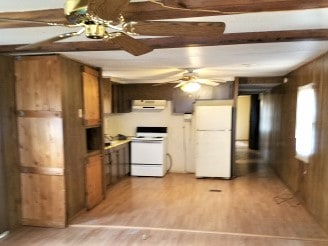
Before 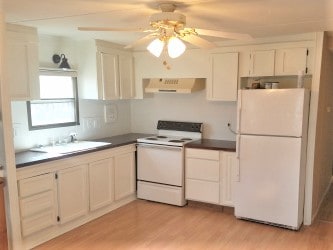
After
I had so many ideas on how to make it cute, but this was one project where we couldn’t put the funds into it. We had to address several issues that took from the design budget. The main power line had to be replaced, the bathroom floor had to be replaced down to the joists, soft spots in the subfloor had to be replaced and plumbing repairs in the kitchen and bathroom took precedence over whatever else I had in mind.
Mobile Home Kitchen Makeover
The kitchen cabinets were covered in years of bachelor-cooking-grease and smokers tar so my MIL scrubbed and sanded them down. The cabinets were particle board so the edges were showing some wear and I was afraid with much more use they would start to fall apart.
We went to the local Habitat for Humanity Restore and picked up some trim pieces and edged each door and drawer and attached with an air stapler, caulked the holes and painted away.
The trim covers the edges where cabinets get the most wear, so we are hopeful they will last for several more years.
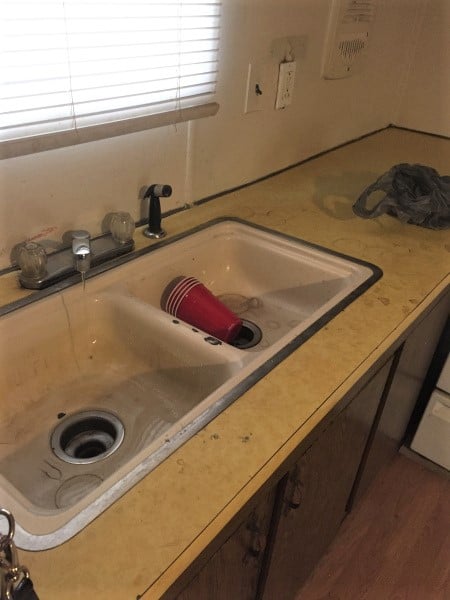
Before 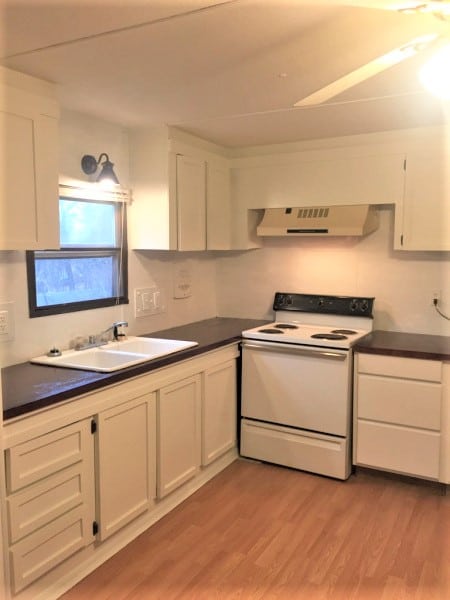
After
There was a space between the stove and fridge that we were able to find a lower cabinet unit for free and increase the storage space.
The counter tops were completely rotted through at the wall, which I discovered when I went to turn on the water and the faucet fell through the counter!
As I said, the budget was nonexistent for this mobile home makeover, so my hubby came up with using plywood as a counter top. We stained it and I sealed it with about fifty coats of polycrylic….ok, well it was only like eight…but it FELT like fifty!!! I did roll it on for easier coverage, but I ended up going back over very quickly with a brush to get a better finish.
Probably the best deal we got was the new-to-us kitchen sink from Restore for $10 It completely changed the feel of this kitchen. The old sink was chipped and worn and no amount of scrubbing was going to make it look good.
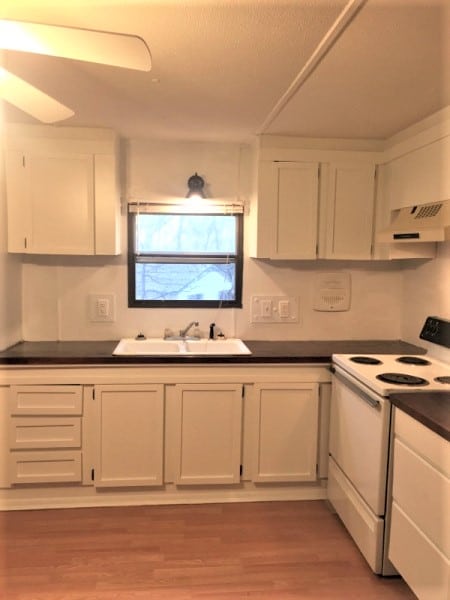
I would have preferred replacing the cabinets so that the doors all hung straight and everything was brand new. Sometimes we cannot invest that much in a makeover so we just did the best we could.
Mobile Home Fridge Makeover
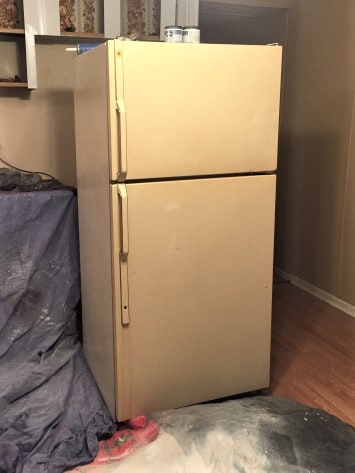
The fridge was still perfectly functional but the previous tenant had smoked it into a different era; one where gold colored appliances were desired. I scrubbed it with soap and water, a Magic Eraser, Comet and it still wouldn’t go back to its original color. So I shopped around and found some appliance enamel and TA-DA! It looks like a brand new fridge! I just love paint!
Before 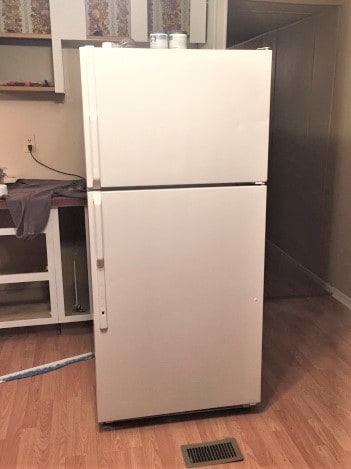
After
A word to the wise, be smarter than me and move the appliance outside. The floor and cabinets were covered with sheets, but the overspray went further than anticipated. Which means I had to scrape the floor with a putty knife to get all the enamel up. Learn from my mistakes.
Mobile Home Bedroom Makeover
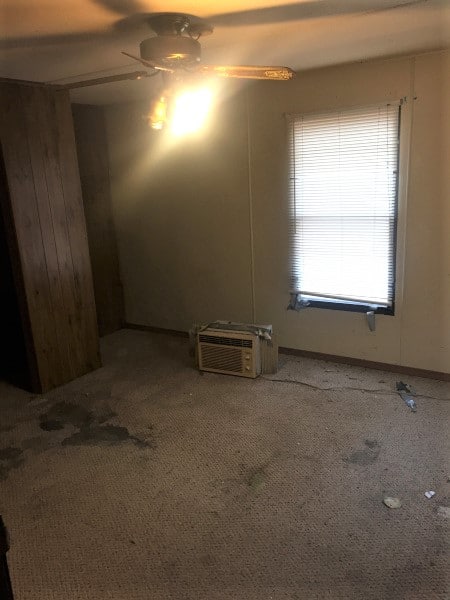
Here is the master bedroom transformation. We got the dome light from the Restore for $1.50 and the flooring my hubby bought at an earlier time from there for super cheap. Normally I would not take down a ceiling fan because they are practical, but these are seven foot ceilings and the light hangs down more than a foot. I was the only one(I’m 5’2″) who could walk underneath it without bonking my noggin, so it had to go.
Before 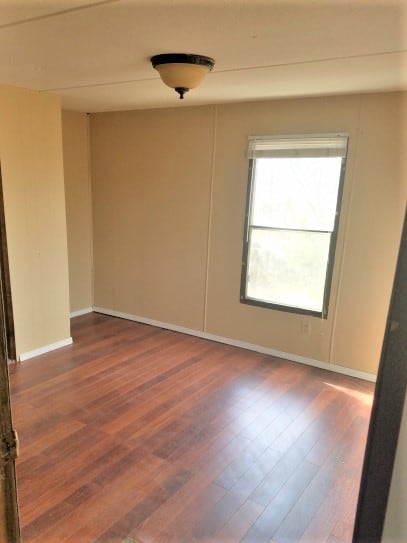
After
Painting wood paneling
The paint also came from…you guessed it…Restore!!! Now, here’s the thing, you can not be too picky when trying to renovate on a shoe string budget. Some things, like paint color, you just have to be flexible with. We ended up with six five-gallon buckets of this particular paint color at $5/5-gallon bucket. What that means though, is that we’ve done quite a few projects in this particular shade of tan.
When painting over wood paneling there are several different options, depending on how much work you would like to put into it. If you dislike the grooves in the paneling you can use spackle to fill in all the grooves, let dry, sand and repeat if needed. The spackle shrinks a little as it dries so make sure the groove is completely filled in.
If you are fine with the grooves in the paneling then your first step should be thoroughly cleaning the paneling. Even if it doesn’t look dirty, the walls need to be cleaned so the paint will adhere properly. Dish soap and warm water would be fine. Make sure to wring your cloth out as you don’t want to saturate the walls.
Then you want to lightly sand the walls. This may seem like an unnecessary chore, but it is vital for the longevity of your paint job! The easiest way I’ve found to sand walls is to put a finer grit sandpaper on a pole sander and sand away. The point is to dull the sheen, not to create deep scratches on the surface. It’s more like a light sanding overall to give the paint a better surface to adhere too.
Once the sanding is done, vacuum the walls and floors to remove any dust. Then paint a light first coat of primer. The wood paneling may react differently in each home, so use a light hand at first. The grooves don’t take paint as easily as the flat surface, but will cover eventually. Use firm pressure over the grooves to ensure adequate paint coverage , then lightly rolle over the surface to get any excess paint. I used one coat of primer and two coats of paint on this trailer.
Steps for Painting Wood Paneling
- Clean walls thoroughly with dish detergent and water or some other cleaner that will cut through grease. Do not saturate the walls.
- Sand lightly with finer grit sandpaper 120 or higher.
- Vacuum the sanding dust and/or wipe down with a damp cloth.
- Paint with a light coat of primer. Let dry
- Paint with one or two coats of your preferred paint, ensuring coverage over the grooves.
Mobile Home Bathroom Makeover
Apparently we forgot to take a picture of the before bathroom, so here is the only one I have. We painted the vanity and continued the flooring from the master bedroom into this bathroom because we had to replace a good section of the floor underneath the toilet and the entire floor under the tub.
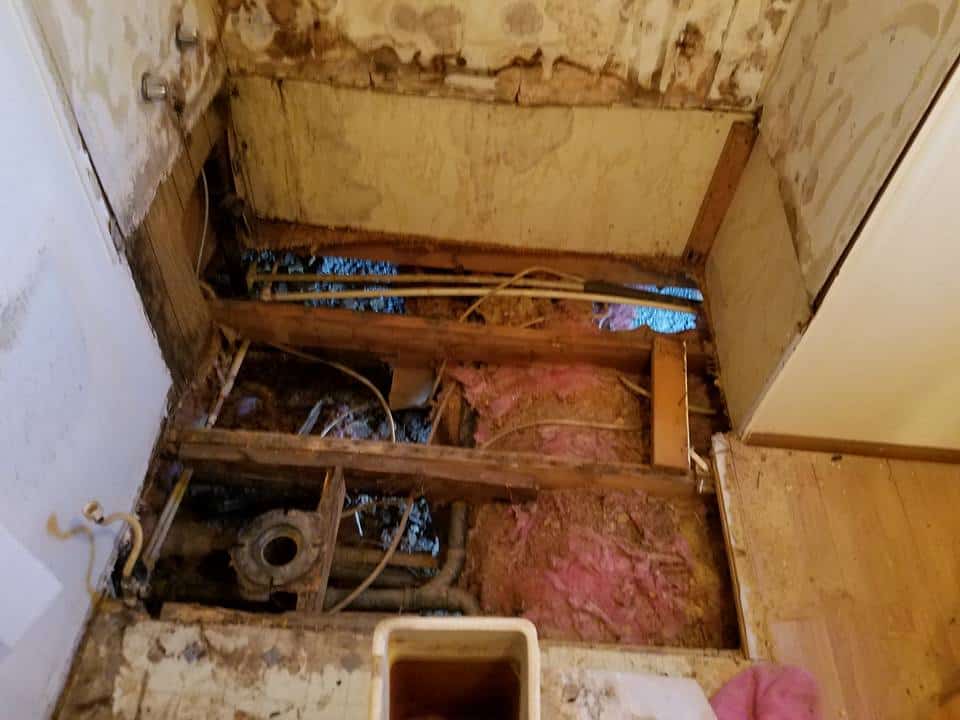
Before-torn out tub 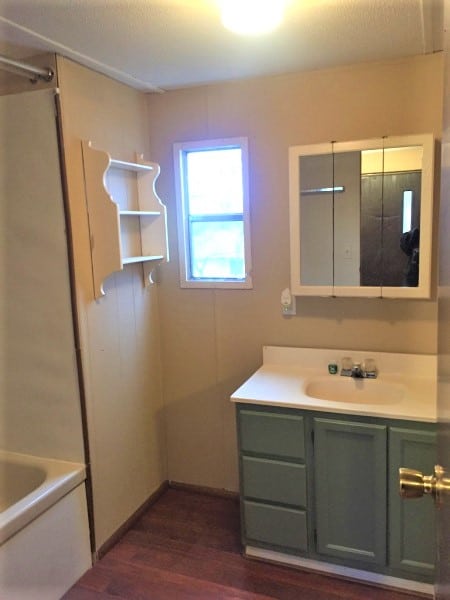
After
We are learning as we go and having a great time along the way!
It was difficult to limit ourselves on this mobile home makeover, but it came down to the fact that it was an investment property. We have had a lot of criticism as well as praise for the reno on this mobile home. Bottom line is this is now a safe structure for someone to rent. We dealt with the safety hazards and spent what we could on making it inviting.
When you are trying something out of your comfort zone, negative criticism can derail anyone from wanting to try again. They don’t know your heart though. Review their comments, take any truth you can glean from it, then throw the rest away! Also, having your husband go delete any mean comments helps too!
Go out and try something new! It’s a lot of fun.
Em 🙂
Wow!!! You all did an amazing job! What an
improvement for so little money!
Em — you are my new BFF, ‘kay? Jus’ sayin’. <3
I love everything about this! I wish this post was around a few years ago; I needed you in my life! I painted over wood paneling with sand added to the paint to add "texture". P.s. Don't EVER. do. that.
Thank you so much for sharing your talents with the world. So grateful. You have a fan/subscriber/follower/DIY stalker right here. 😉
This is amazing!!! It looks so much more open. I grew up in a mobile home most of my life. I would love to be able to go back in time and remodel it just like this!!!
I love, love, love what you did on a budget! Goes to show that you can make a hugs impact without spending a fortune! Great article@
I am inspired at how much can be done with such a small budget and I need to get to using that Restore!! Sounds like an amazing resource.