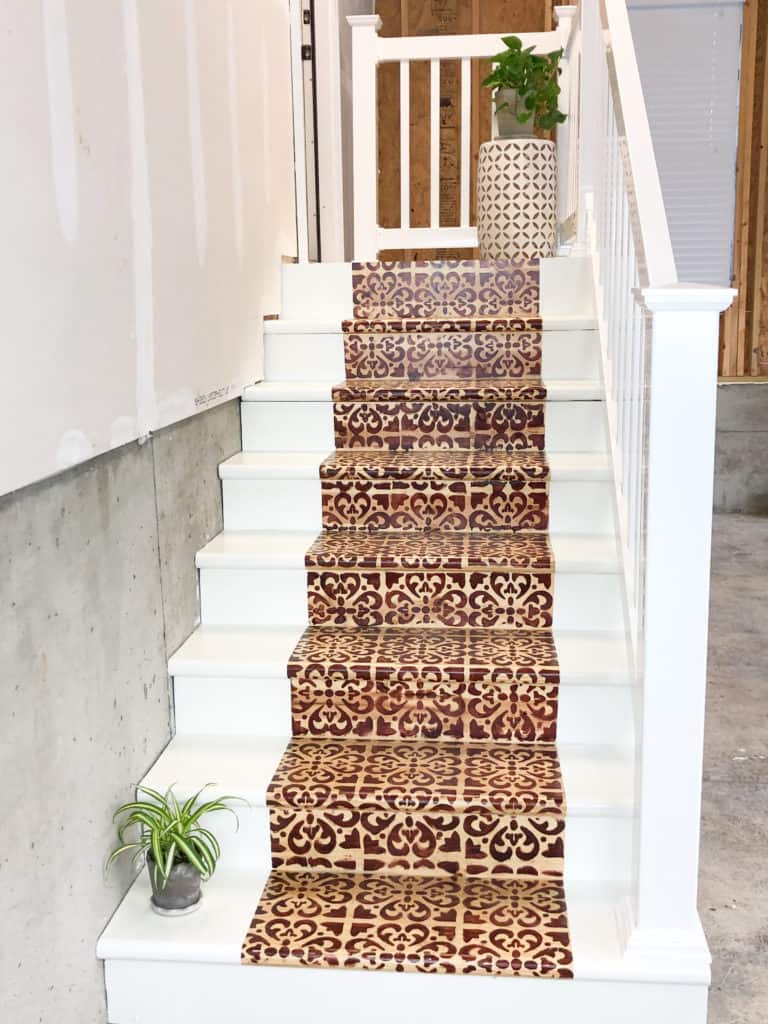
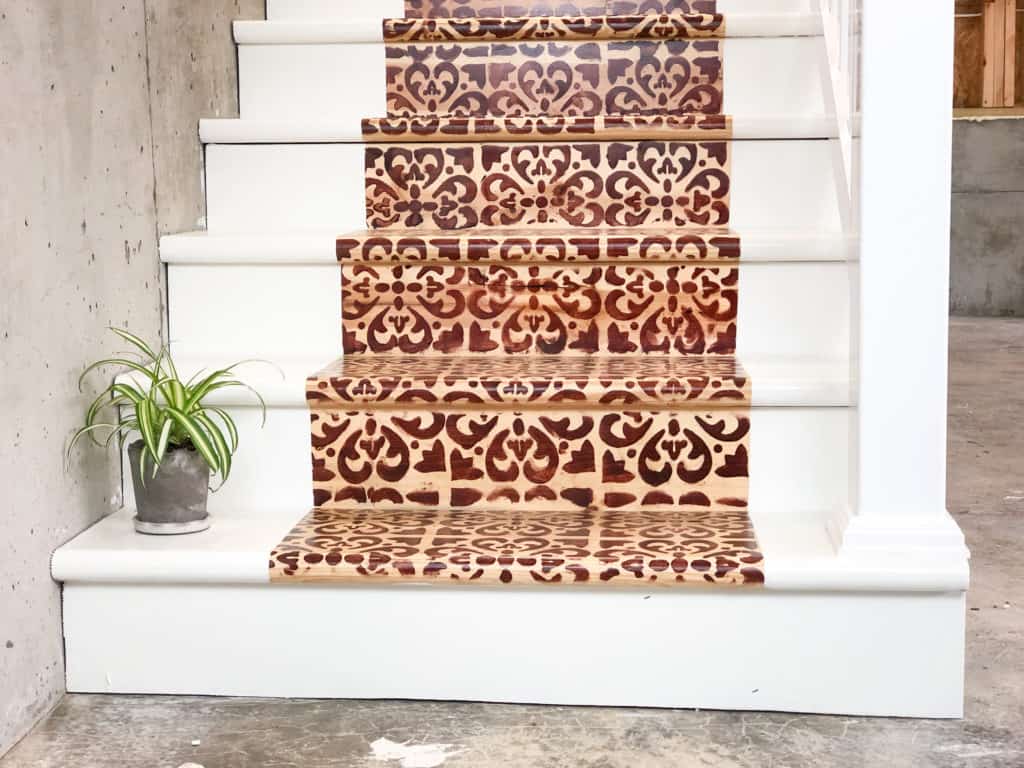
Follow along with the step-by-step tutorial on how to transform your garage steps with stain, a stencil and a little bit of paint. Makeover your stairs with this easy-to-clean stair runner.
First choose the design you would like to use. I ordered the stencil from Dizzy Duck Designs on Etsy.
Then choose your stain and paint colors. Use a scrap piece of the wood you will be staining on and apply several different colors of stain until you get the one you like. Most of the time, I thin the stain to achieve the right color and opacity. Use Mineral spirits to thin oil based stains and water for water based stains.
Prepping the surface
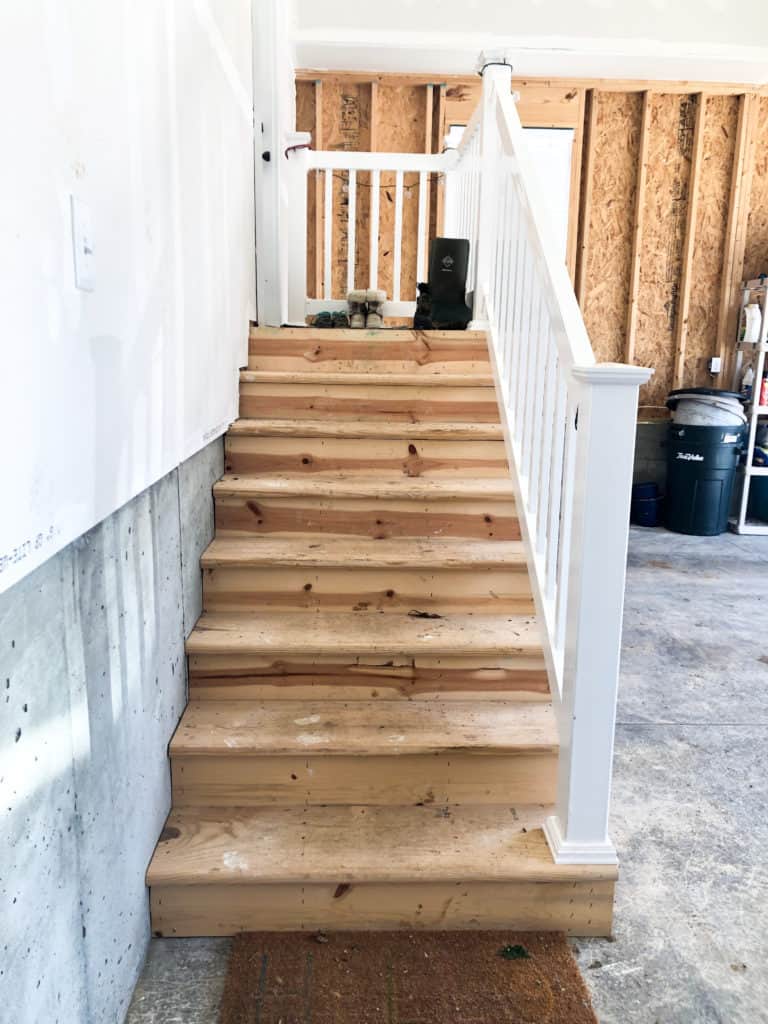
Prepping your surface is one of the most important things you can do in any painting/staining project. Start by sweeping the steps and then sand them down. These are not interior steps, so the quality of the wood is probably not as high, so don’t go crazy on sanding until they are perfect. After all these are in your garage and are probably going to take a beating! Use an orbital sander and a medium grit sandpaper (120 or so). If you need to remove writing or they are really rough, then start with a 60-80 grit sandpaper and go back with a 120-150 grit.
Using stainable wood putty, fill in the nail holes in the area you want to stain, let dry and sand flat. It may require two coats to get the holes perfectly flat. The areas that will be painted can be patched with whatever you prefer, wood putty, bondo, spackle, etc.
Sweep again or vacuum and you are ready to start.
Next, determine how wide you want your design/runner to be. Laying the stencil on the stair will help you visualize the space. This is where I made the biggest mistake. I measured from the edge of the stair to the outer edge and it made the runner off center. What I should have done was measure from the railing to the edge of the stair and gone off that center. No one has mentioned it, but I know it every time I look at it!
Marking the center
Mark every step in the center or however you will line your stencil up. This is important to ensure that your design doesn’t get wonky on you!
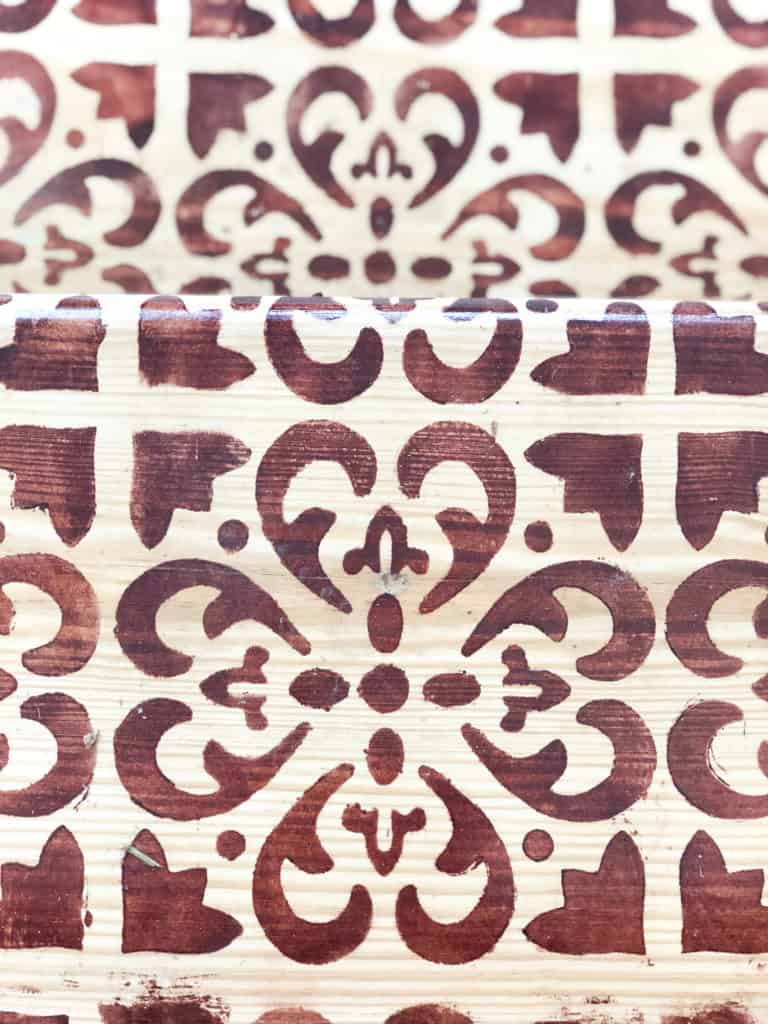
Usually when using a stencil, the method is to do one, then let the previous one dry before lining up the next one. But this would have taken me two weeks to accomplish. I just dabbed the back of the stencil with a paper towel to remove any excess stain and moved on.
Application of the stain
In the video, I trialed two different ways to get the stain on the steps. First was the foam brush which worked fine, but was very slow. Second was the foam roller which was a much better idea. It allowed for much quicker application of stain.
Once the stenciling has been completed, let it dry according to the instructions on the can. This is important because the painters tape is going to go right over it and it needs to be fully cured to prevent lifting.
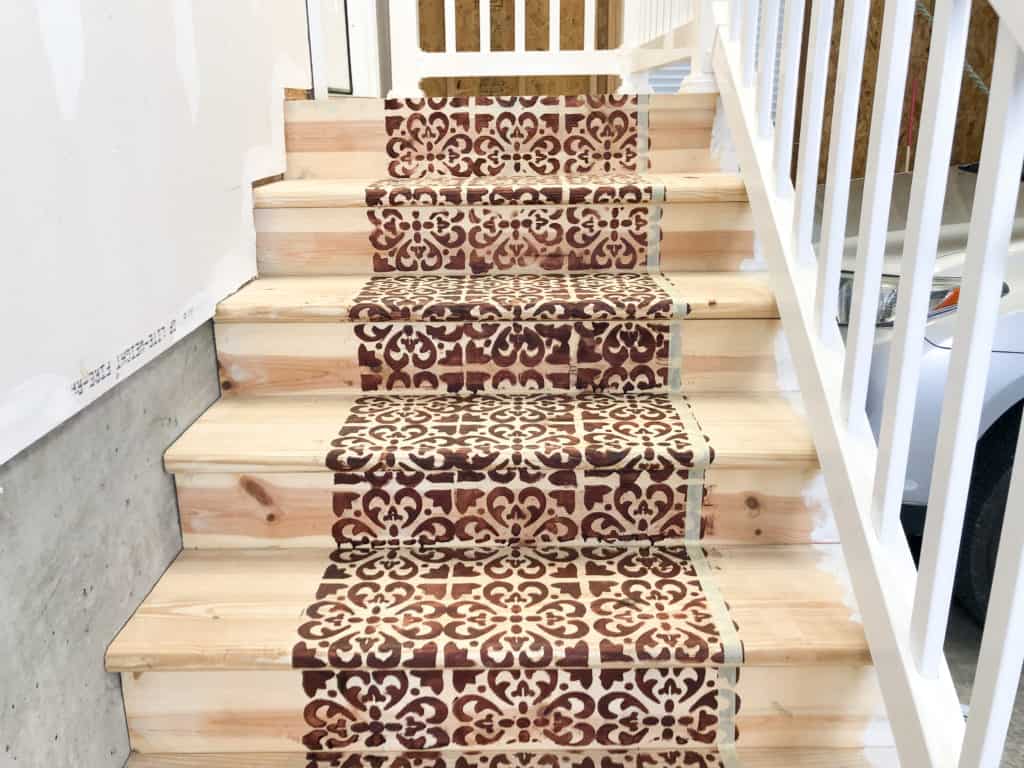
Mark the line on each step for the tape to line up to. This will prevent the painted edge from wandering. It’s easy for the stencil to move a little when staining, but we want a sharp straight line for the paint.
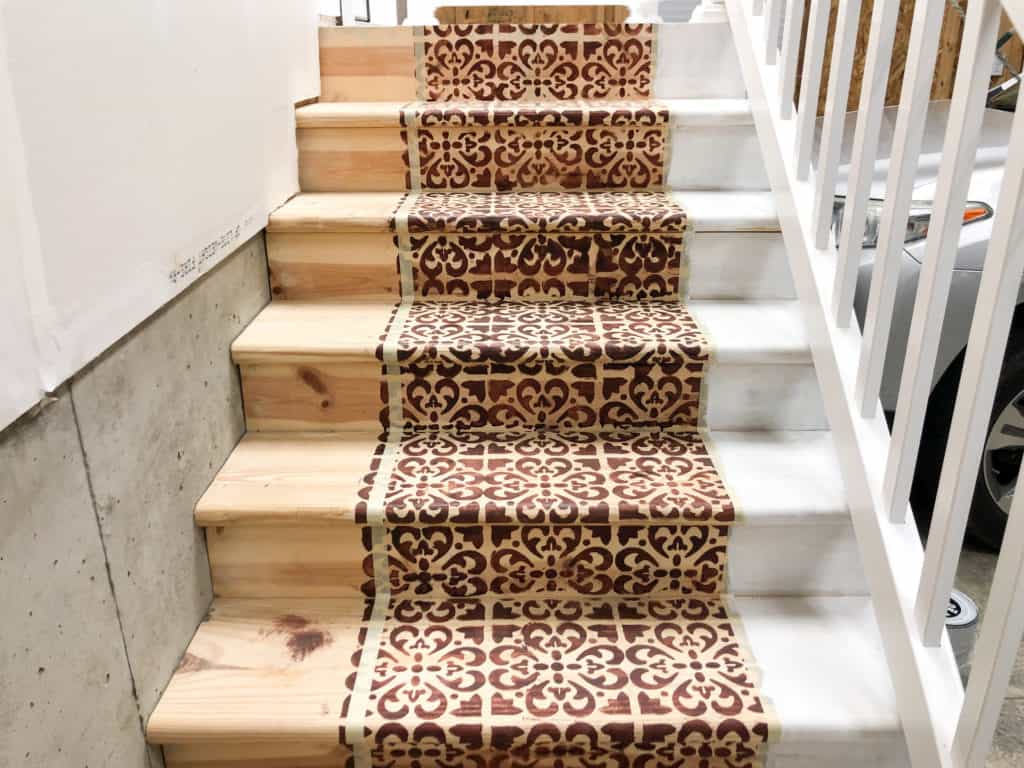
Third, apply two coats of primer and two coats of paint. Let dry completely. Lastly apply three coats of polycrylic to provide a long lasting finish. If you used only a dark stain and a dark paint color, then you may use polyurethane. It is not to be used over light colored paint as it does amber (turns yellow) over time.
Supplies for DIY Step Makeover
- Random orbital sander
- Sandpaper discs 60 grit-120 grit
- Wood Filler-stainable
- Stain
- Primer-especially if you are using a light colored paint or you are painting on new wood.
- Paint-exterior or paint intended for hard use would be ideal
- Polyrylic
- Gloves
- Foam roller and handle
- Small paint tray or disposable plate
- Stencil
- Paper towels
- Painters tape
- Baby wipes
Steps for Stencil Staining Stairs
- Prep the suface by sweeping, then sanding with a random orbital sander with 60-120 grit sandpaper. This is just to get off the rough edges, not to obtain perfection.
- Fill holes with wood filler that is stainable. Sand and sweep again.
- Mark stairs at the center
- Pour stain onto a disposable plate or a small paint tray
- Using a foam roller, lightly apply the stain to the stencil
- Remove stencil carefully, wipe off the back of any excess stain
- Repeat until your design is finished
- Allow to dry completely
- Touch up any areas or sand off if needed
- Sweep
- Tape off edges to paint
- Two coats of primer
- Two coats of paint
- Remove tape slowly and at an angle
- Let cure
- Three coats of polycrylic
- Avoid heavy use until the polycrylic is fully cured
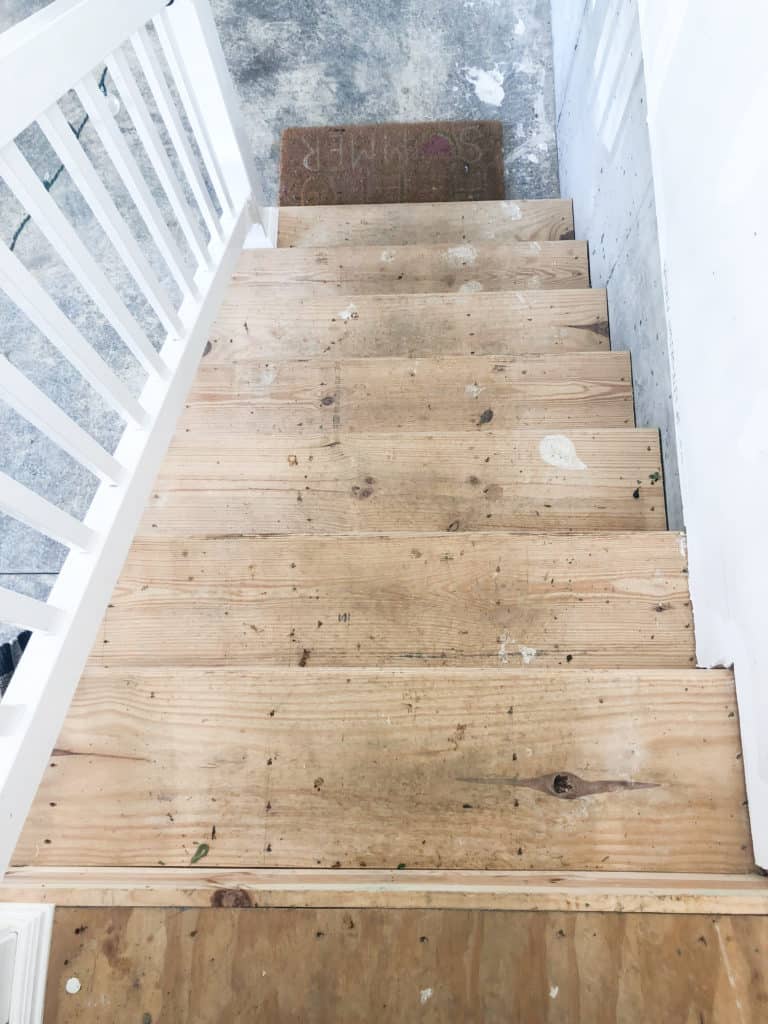
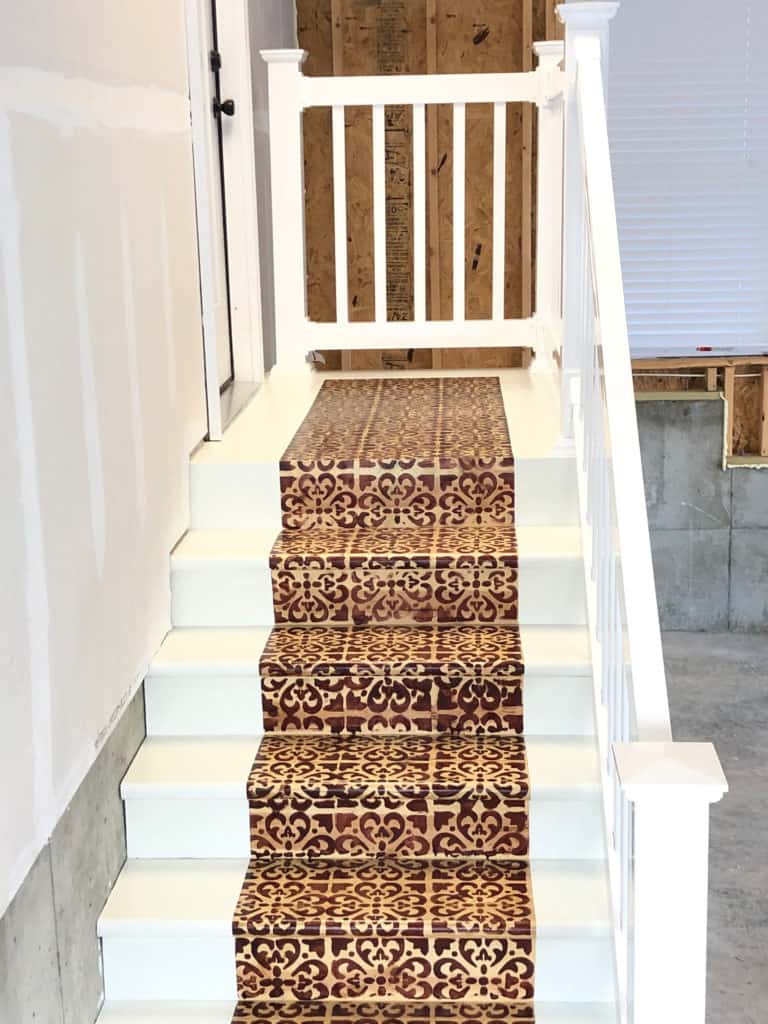
Before 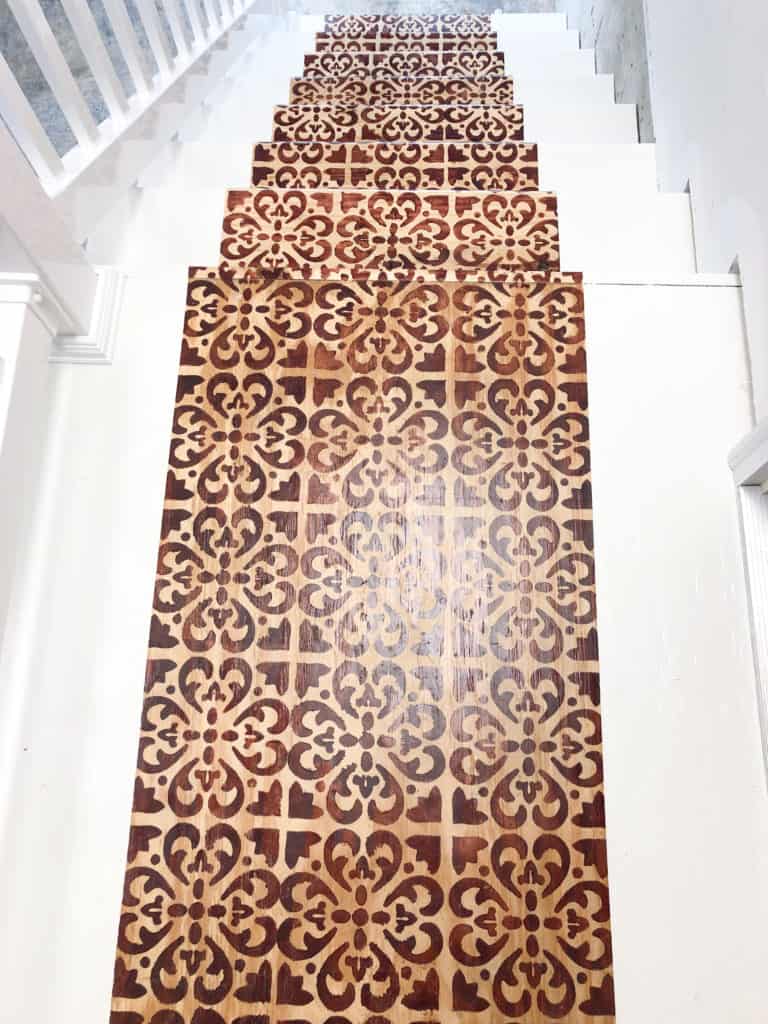
After
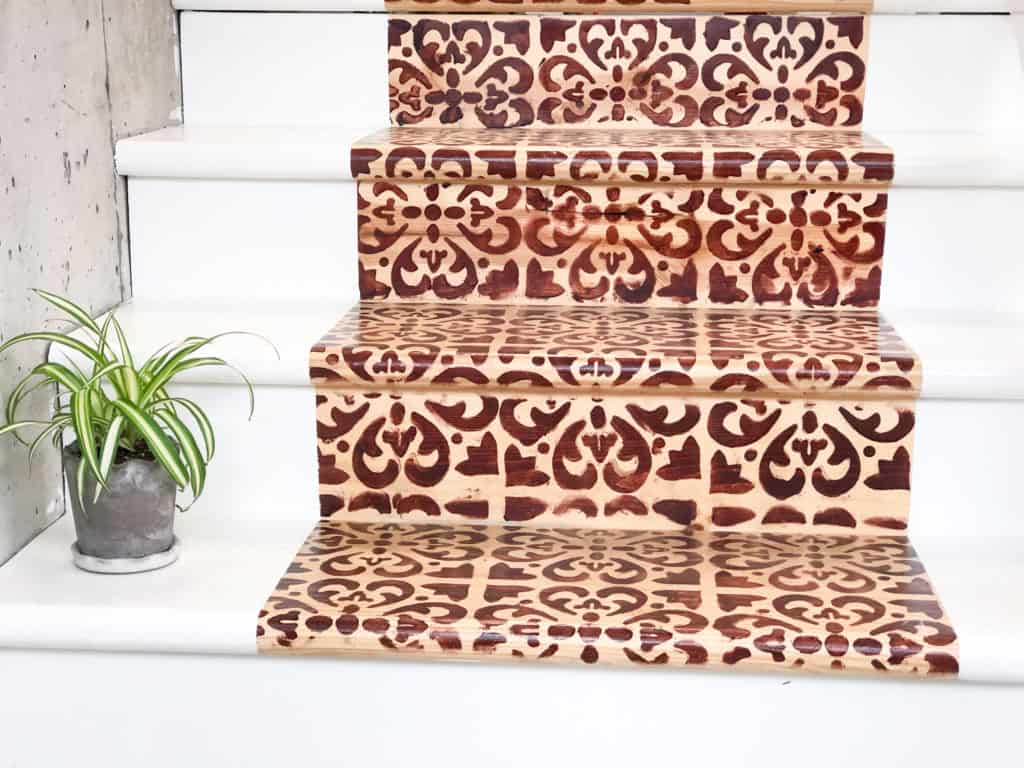
I will definitely use a stencil in the future because it is such a cheap way to completely transform a space. Using stain wasn’t that much different than using paint, most likely because I was using a gel stain, not a traditional stain. I could imagine that the thinner consistency could cause issues with bleeding underneath the stencil.
The hardest part of this project for me was stenciling around the nose of the step. In researching this project, I was unable to find any tips on how to navigate this tricky area. It helped that the stencil was bendable and I think it turned out fine.
Watch the video below for step-by-step instructions below:
Thanks for watching.
Go out and try something new!
Emily 🙂
I saw that you painted your laundry room floor. What did you use? A stain? Any type of wax or coating afterwards?
Hi Lauren!
I used an oil based paint for the primer, then latex color on top. I sealed it with three coats of polycrylic once dried! Let me know if you have any other questions.
Em 🙂